| # Connect to WeCom AI Bot Platform |
|
|
| WeCom AI Bot is an official AI-friendly bot platform by WeCom. It can be used directly in one-on-one chats and internal group chats, and supports streaming responses. |
|
|
| AstrBot supports this platform since v4.3.5. |
|
|
| ## Supported Basic Message Types |
|
|
| | Message Type | Receive | Send | Notes | |
| | --- | --- | --- | --- | |
| | Text | Yes | Yes | | |
| | Image | Yes | Yes | Requires message push Webhook URL to be configured. | |
| | Voice | No | Yes | Requires message push Webhook URL to be configured. | |
| | Video | No | Yes | Requires message push Webhook URL to be configured. | |
| | File | No | Yes | Requires message push Webhook URL to be configured. | |
|
|
| Proactive message push: Supported, but requires a message push Webhook URL. |
|
|
| ## Configure WeCom AI Bot |
|
|
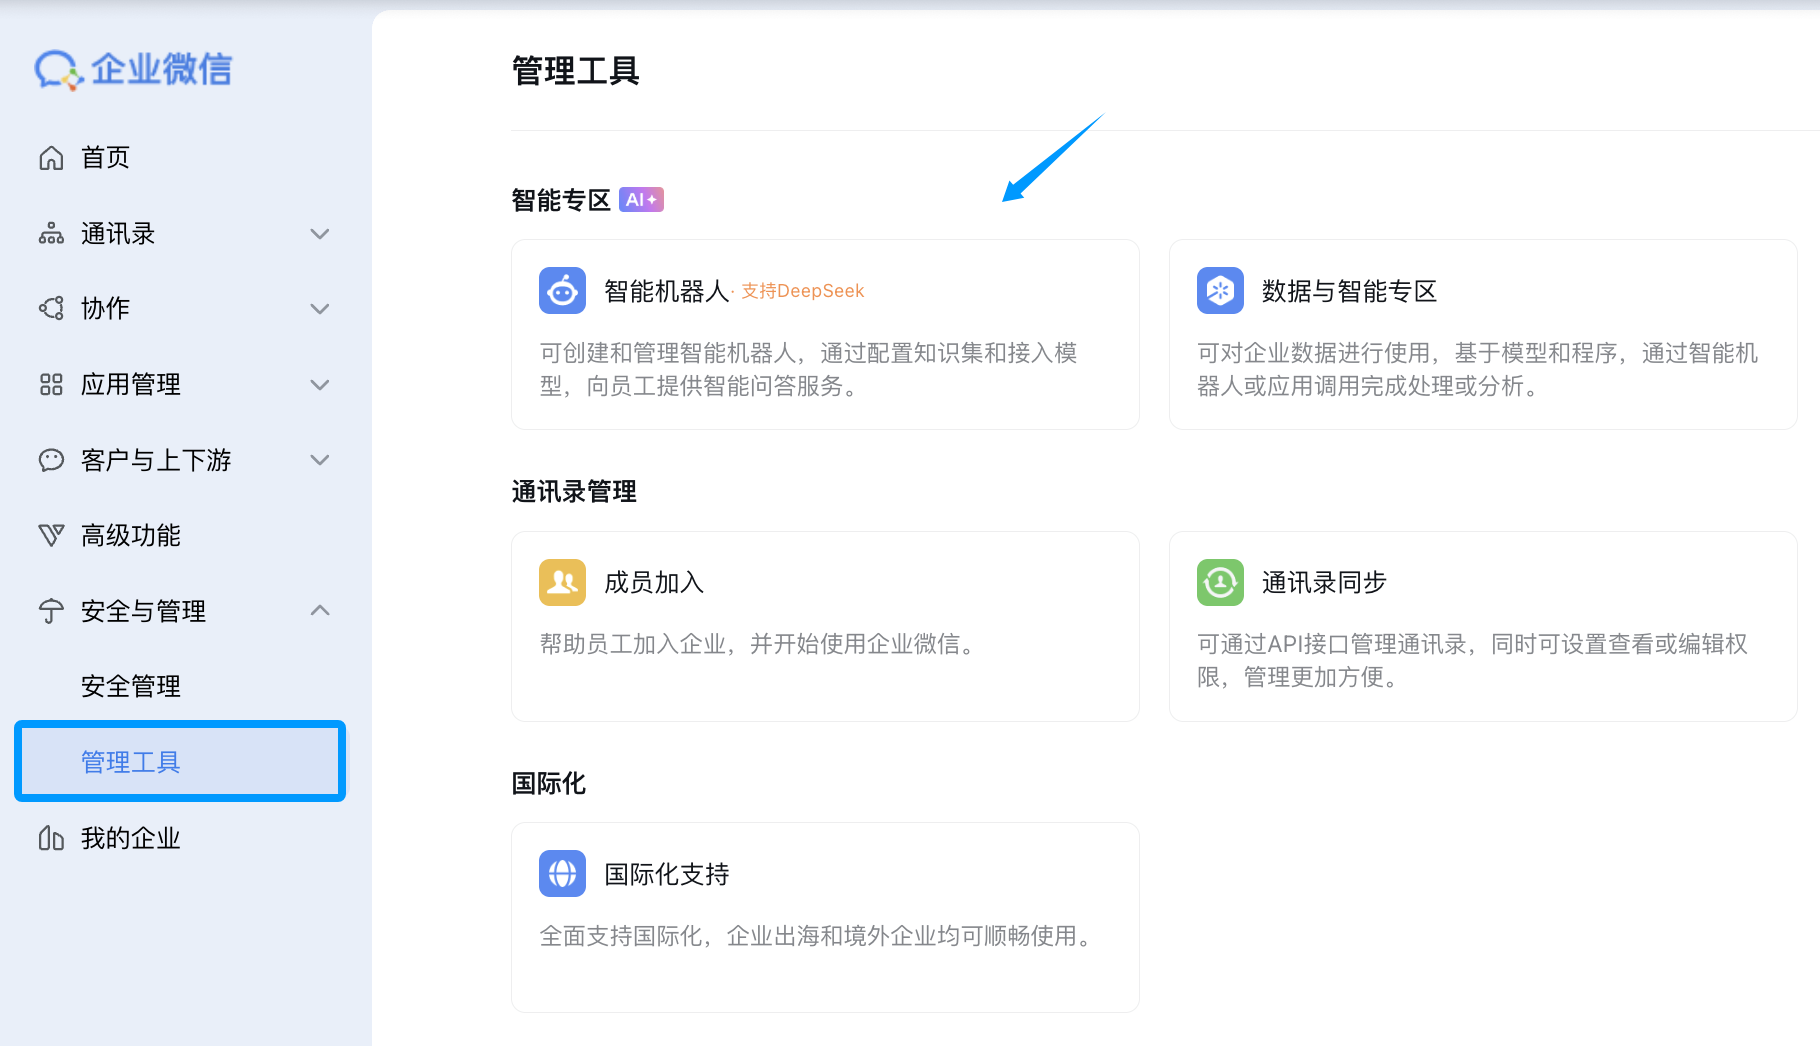
| 1. Sign in to [WeCom Admin Console](https://work.weixin.qq.com/wework_admin). |
| 2. In the left sidebar, open `Management Tools` -> `AI Bot`, then click Create Bot. |
|
|
|  |
|
|
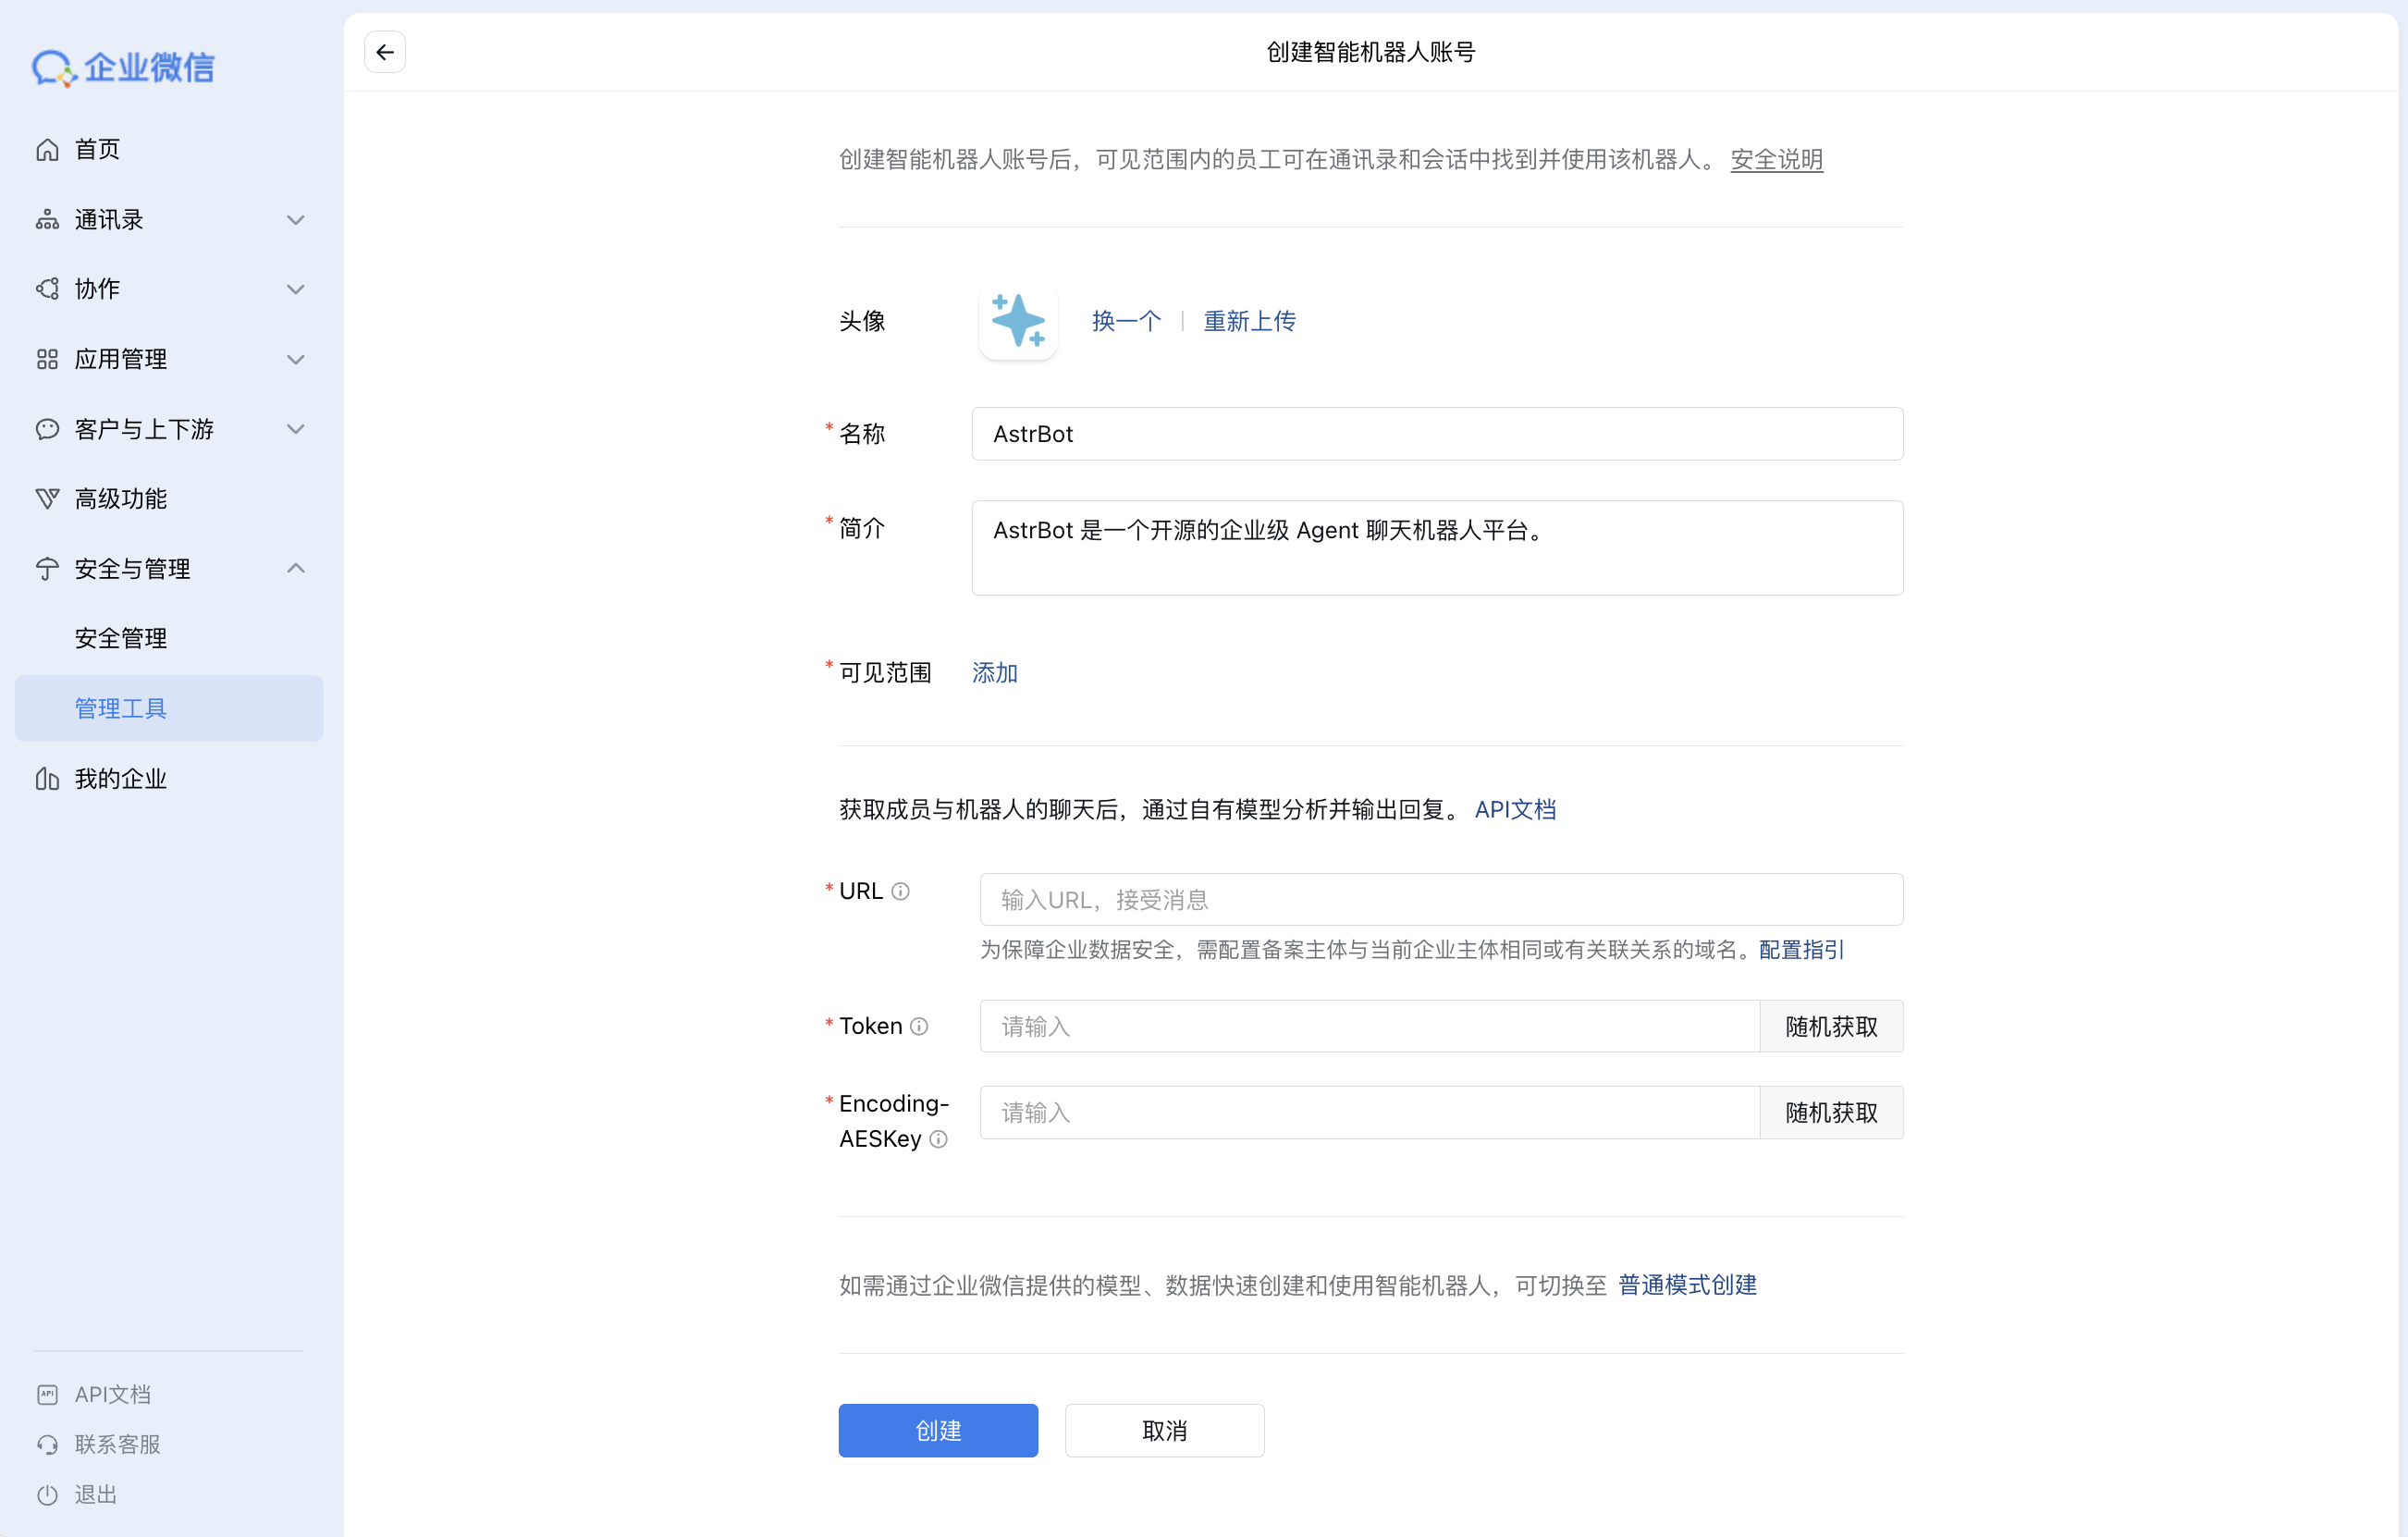
| 3. On the create page, choose `Create via API Mode`. Fill bot name/avatar and other basic info. |
| Generate `Token` and `EncodingAESKey` using random generation, but do not click Create yet. |
|
|
|  |
|
|
| ## Configure AstrBot |
|
|
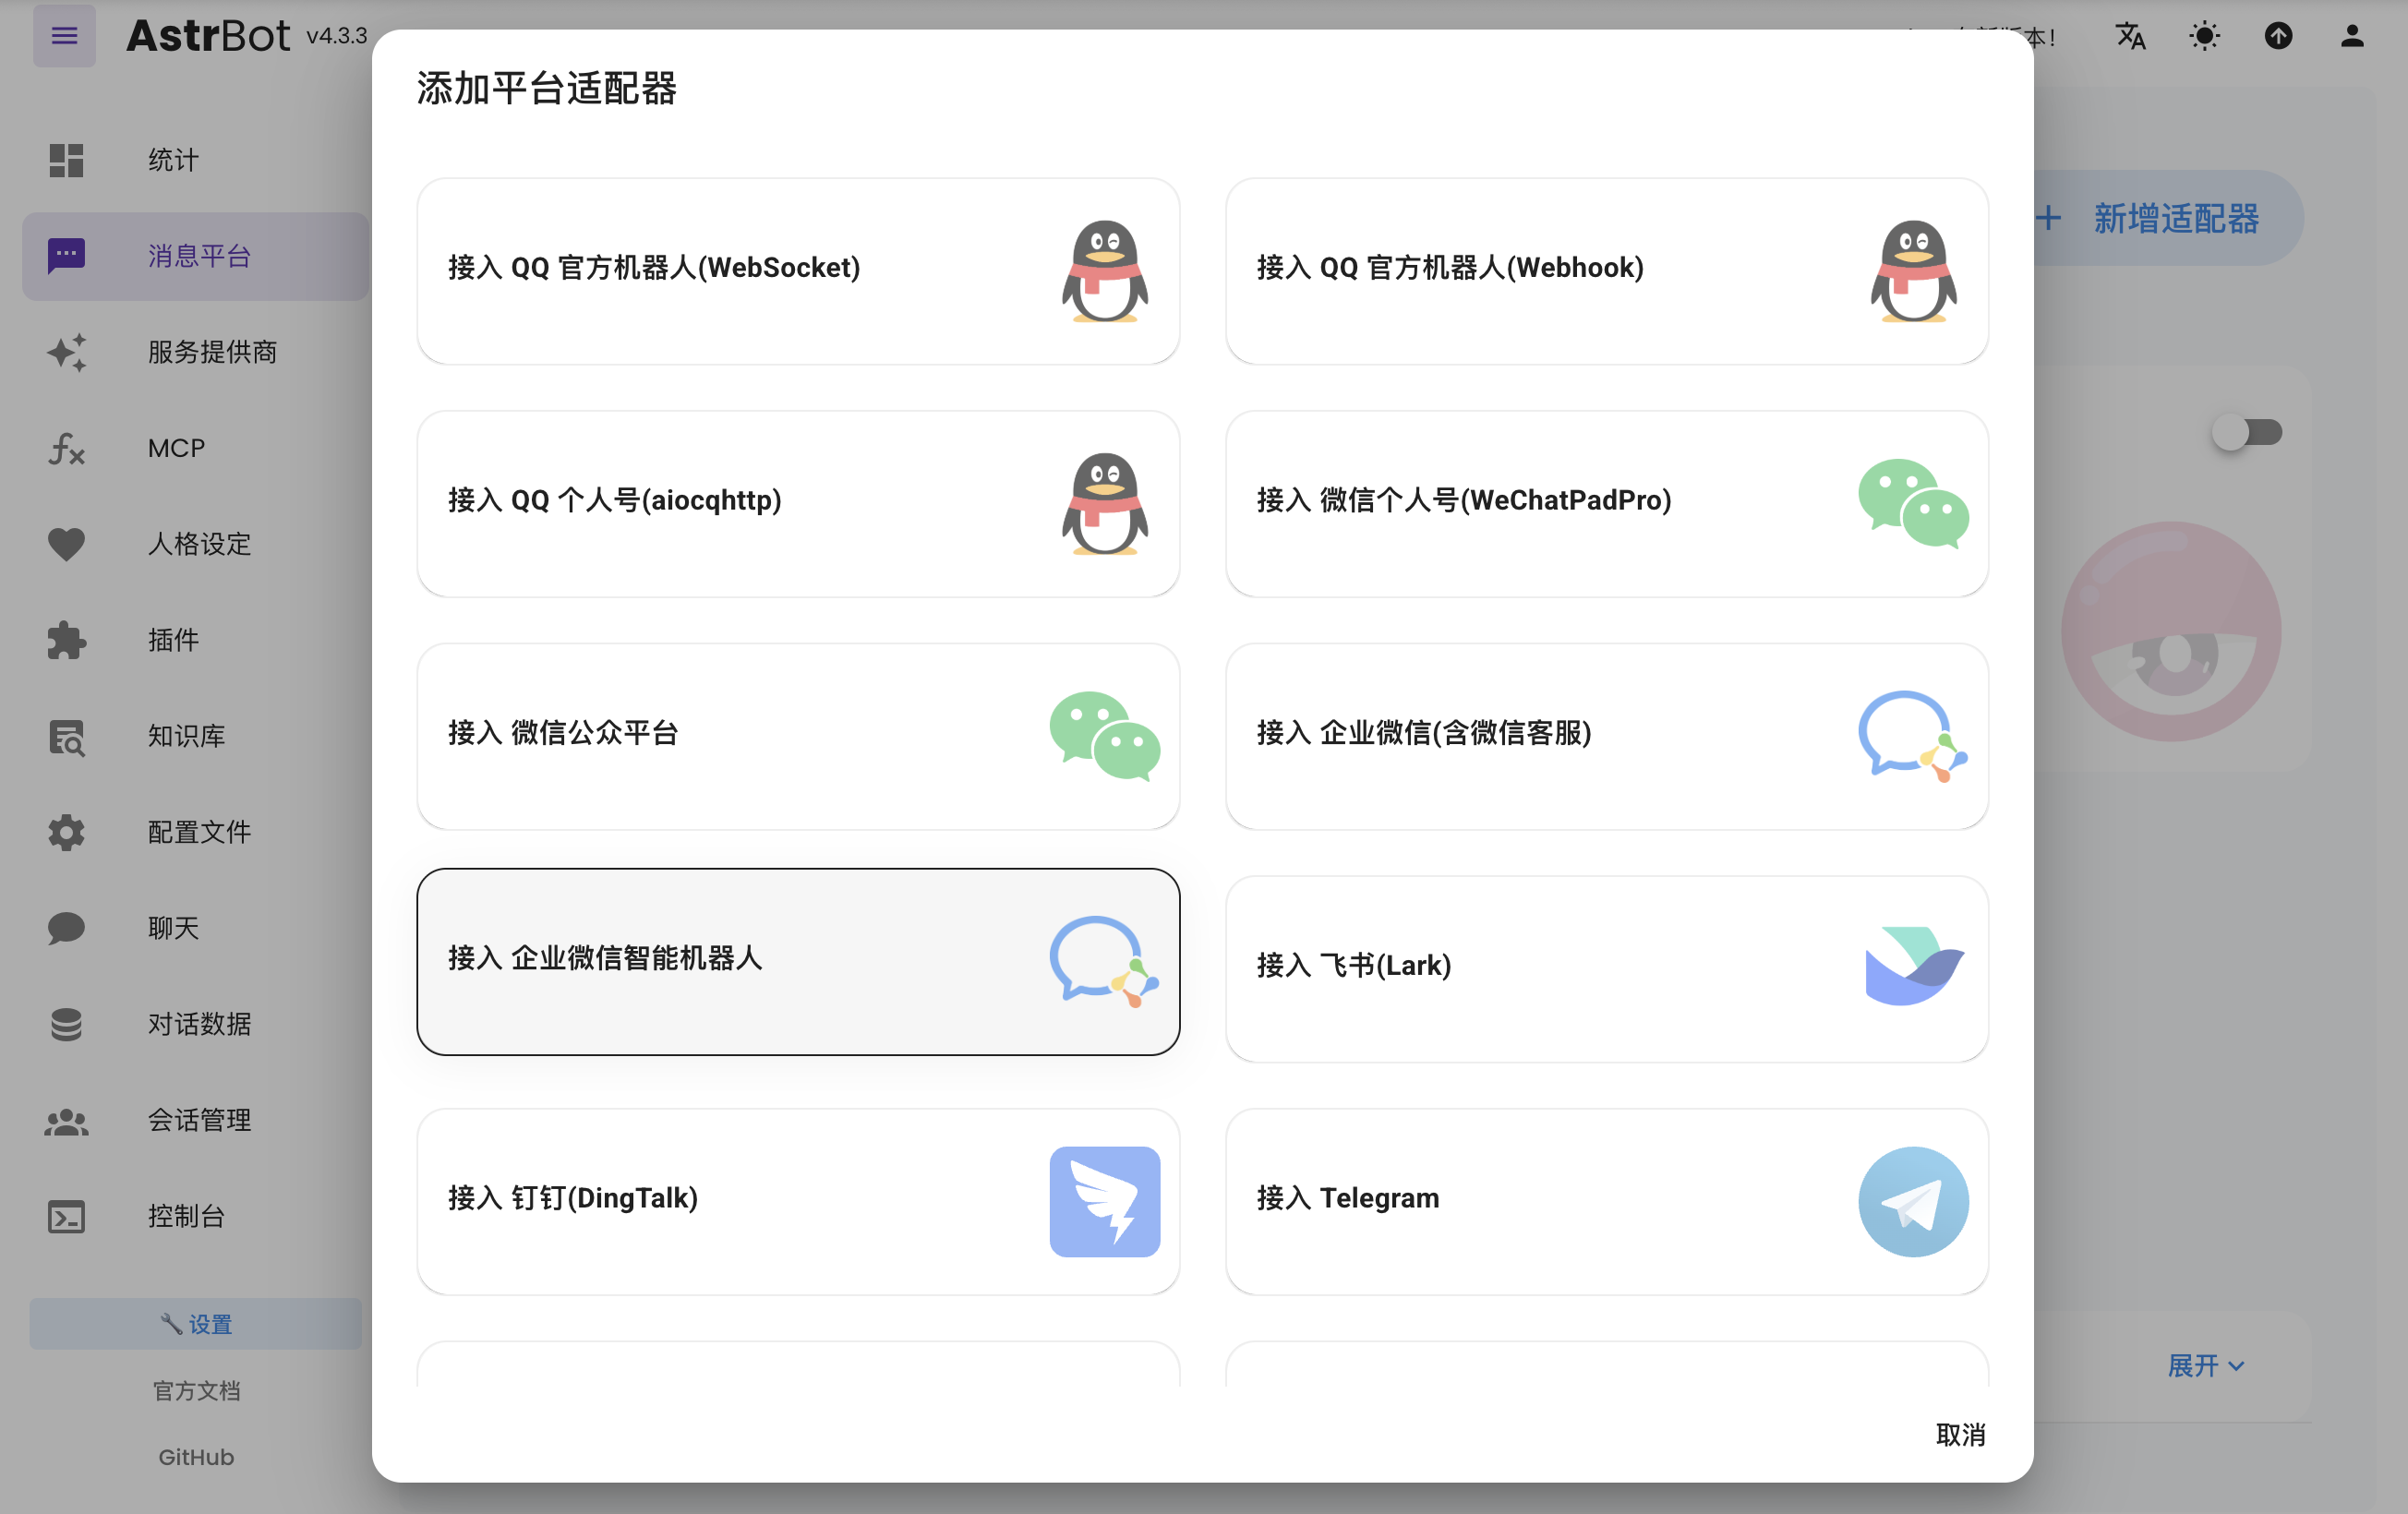
| 1. Open AstrBot Dashboard, click `Messaging Platforms`, then click `+ Add Adapter`, choose `WeCom AI Bot`. |
|
|
|  |
|
|
| 2. Fill AstrBot fields with values from the WeCom AI Bot create page: |
|
|
| - Bot name |
| - `token` |
| - `encoding_aes_key` |
| - `id` (any unique value) |
| - `port` (default `6198`, change if needed) |
|
|
| Keep `Unified Webhook Mode (unified_webhook_mode)` enabled and click `Save`. |
|
|
| 3. Return to WeCom AI Bot create page and set `URL`: |
|
|
| - If unified mode is enabled, AstrBot generates a unique callback URL after save. Copy it from logs or bot card in WebUI. |
| - If unified mode is disabled, use `http://IP:port/webhook/wecom-ai-bot`. |
|
|
|  |
|
|
| > It is recommended to use a domain + reverse proxy + HTTPS. You can also use [Cloudflare Tunnel](https://developers.cloudflare.com/cloudflare-one/connections/connect-apps/install-and-setup/tunnel-guide/). |
|
|
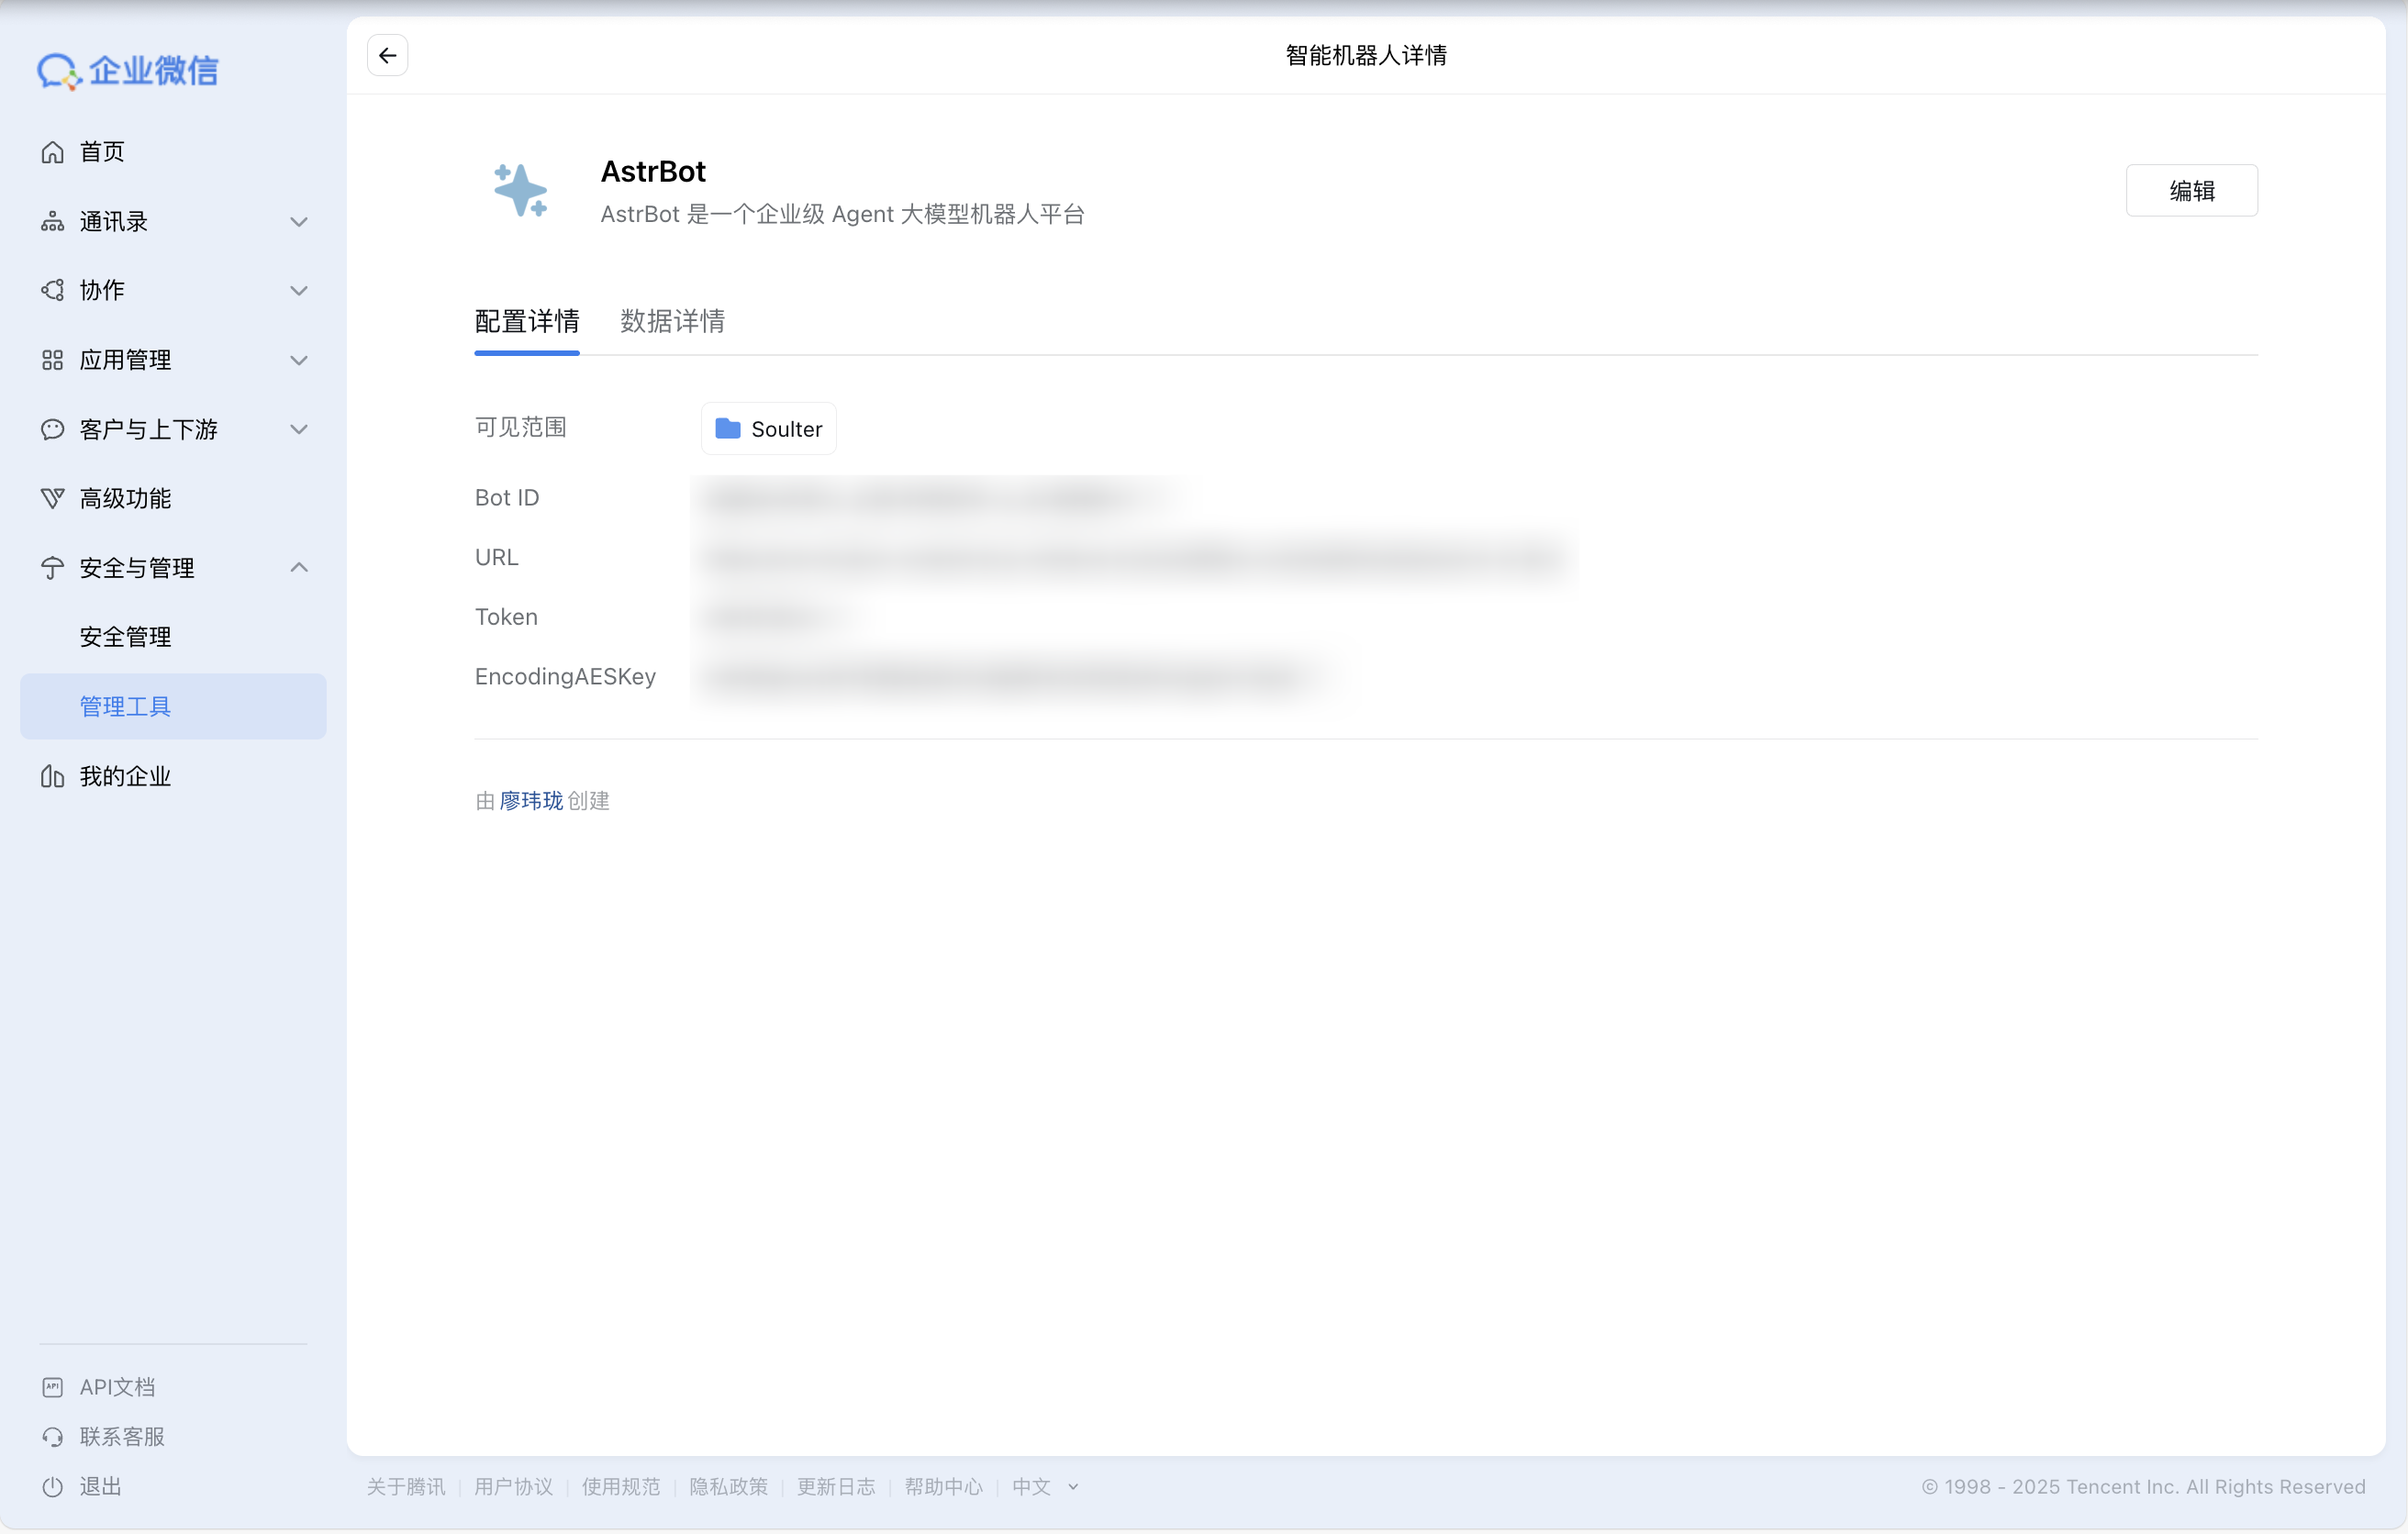
| 4. Click `Create`. If successful, you will enter bot details page. |
| If you see `Service did not respond correctly`, re-check AstrBot config and firewall rules. |
|
|
|  |
|
|
| 5. Optional (recommended): Configure WeCom message push Webhook URL. |
| By default, WeCom AI Bot replies only when users send messages first. Configuring message push enables proactive notifications. |
|
|
| 6. Optional (recommended): Enable `Send messages via Webhook only` for richer multi-message output and to bypass single-bubble reply limits. |
| This option requires the message push Webhook URL from step 5. |
|
|
| ## Use the Bot |
|
|
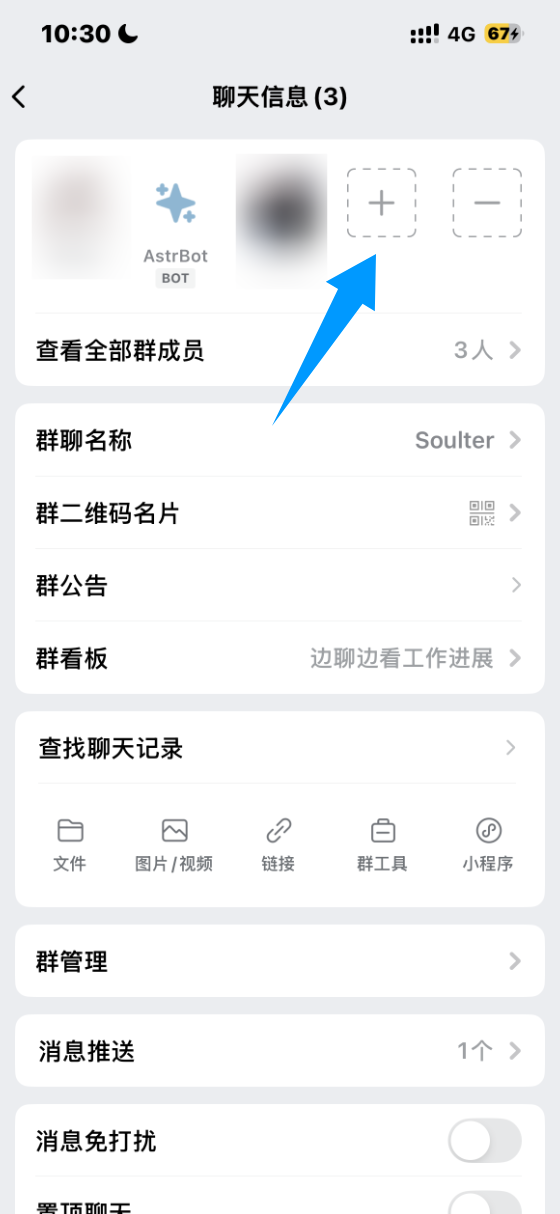
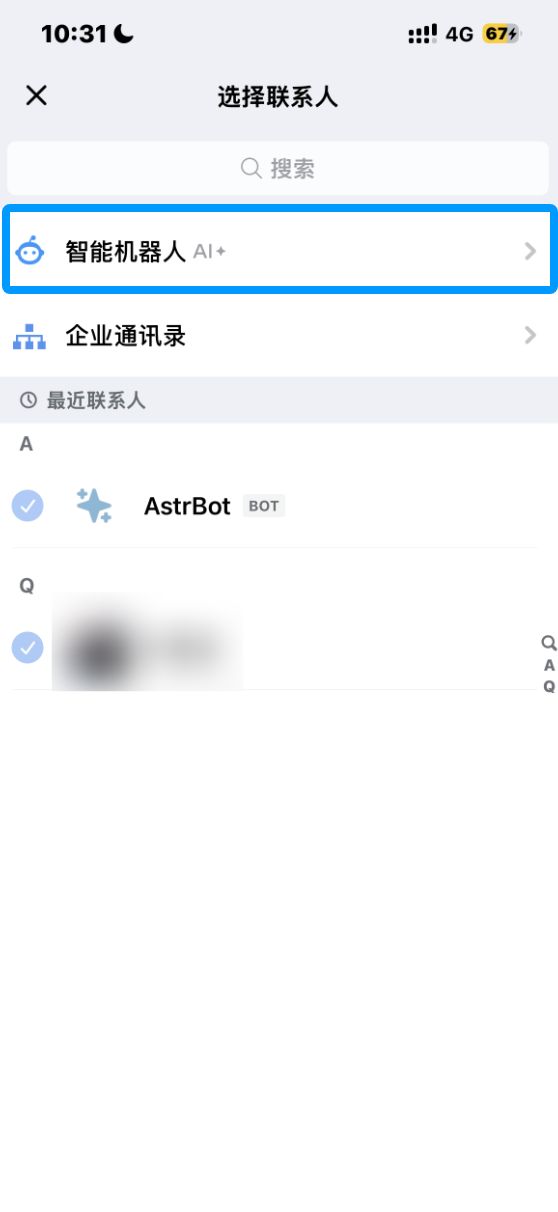
| ### Add Bot to Group Chat |
|
|
| In WeCom client internal group chat, click Add Member -> AI Bot, select the bot you created, and add it. |
|
|
|  |
|
|
|  |
|
|
| ### Chat with the Bot |
|
|
| Send a message in private chat or group chat to talk to the bot. |
|
|
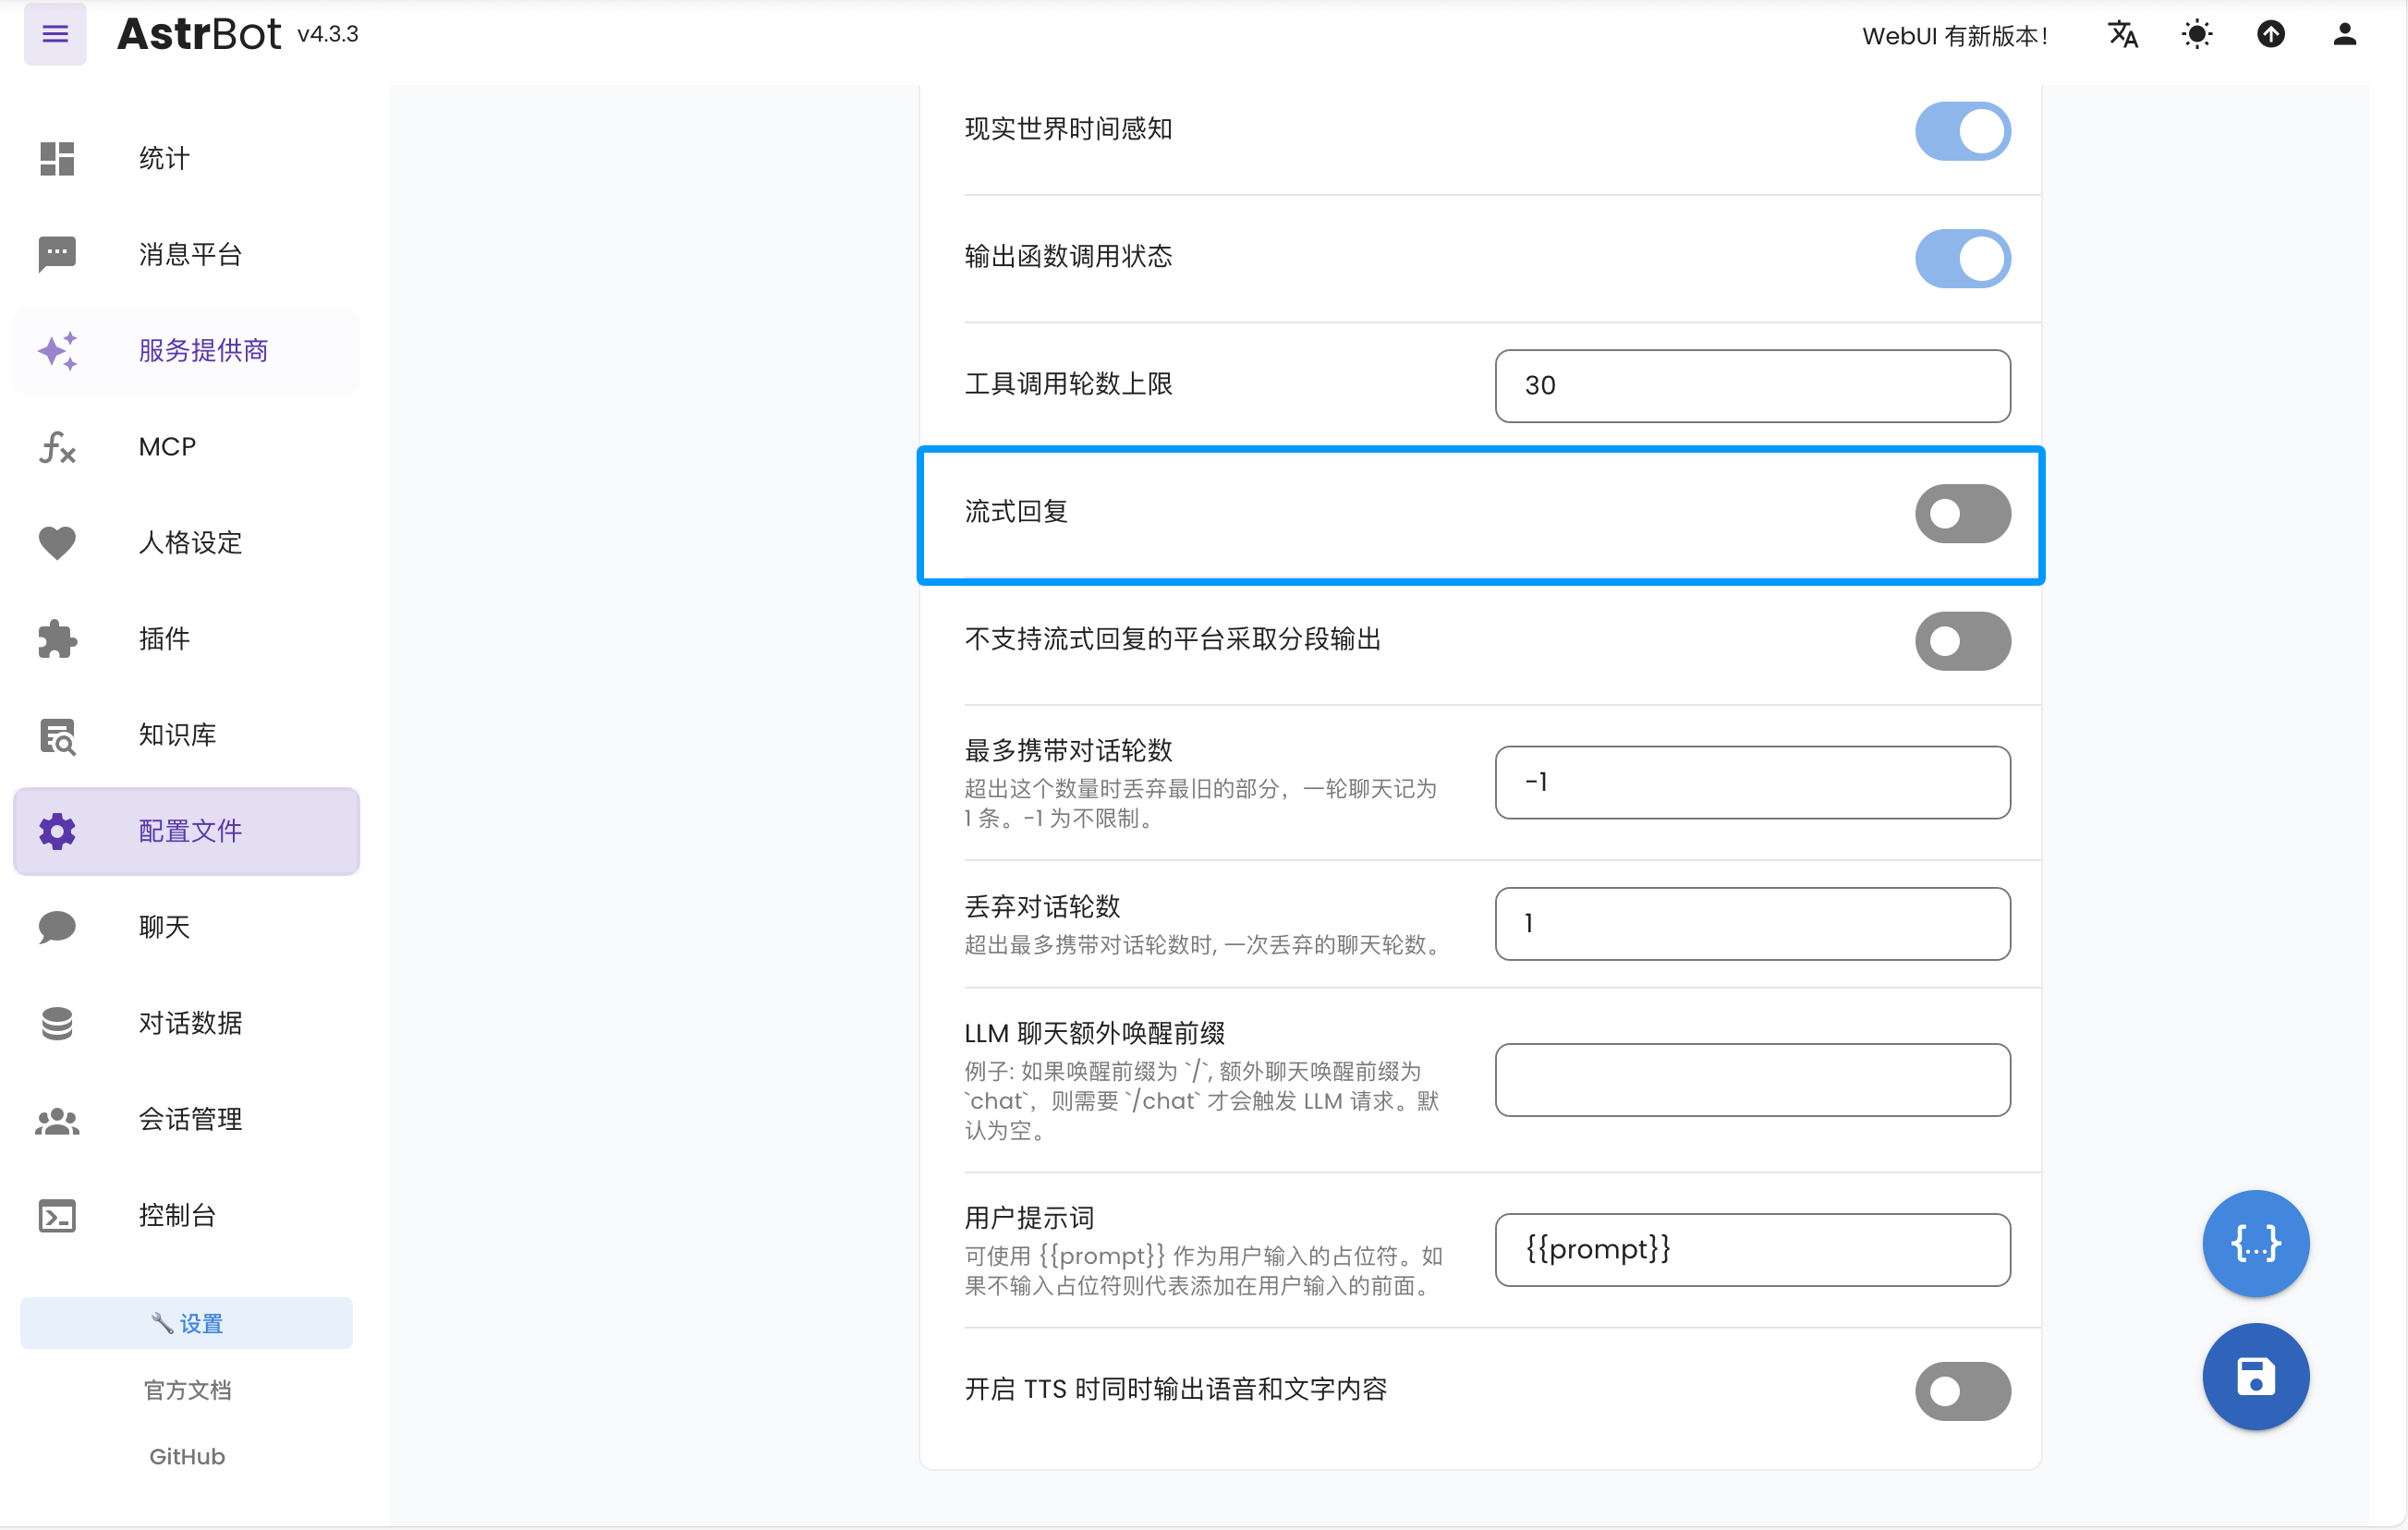
| If you need typing-like streaming effect, enable `Streaming Reply` in AstrBot. |
|
|
|  |
|
|
| ## Help & Support |
|
|
| If you have issues during setup/use or need enterprise support, contact: [community@astrbot.app](mailto:community@astrbot.app). |
|
|
