
File size: 2,892 Bytes
8ede856 | 1 2 3 4 5 6 7 8 9 10 11 12 13 14 15 16 17 18 19 20 21 22 23 24 25 26 27 28 29 30 31 32 33 34 35 36 37 38 39 40 41 42 43 44 45 46 47 48 49 50 51 52 53 54 55 56 57 58 59 60 61 62 63 64 65 66 67 68 69 70 71 72 73 74 75 76 77 78 79 80 81 82 83 84 85 86 87 88 89 90 91 92 93 94 | # Connect QQ via QQ Official Bot (Webhook)
> [!WARNING]
> 1. QQ Official Bot currently requires an IP whitelist.
> 2. It supports group chat, private chat, channel chat, and channel private chat.
> 3. You need a server with a public IP and a domain.
## Supported Basic Message Types
> Version v4.19.6.
| Message Type | Receive | Send | Notes |
| --- | --- | --- | --- |
| Text | Yes | Yes | |
| Image | Yes | Yes | |
| Voice | Yes | Yes | |
| Video | Yes | Yes | |
| File | Yes | Yes | |
Proactive message push: Supported.
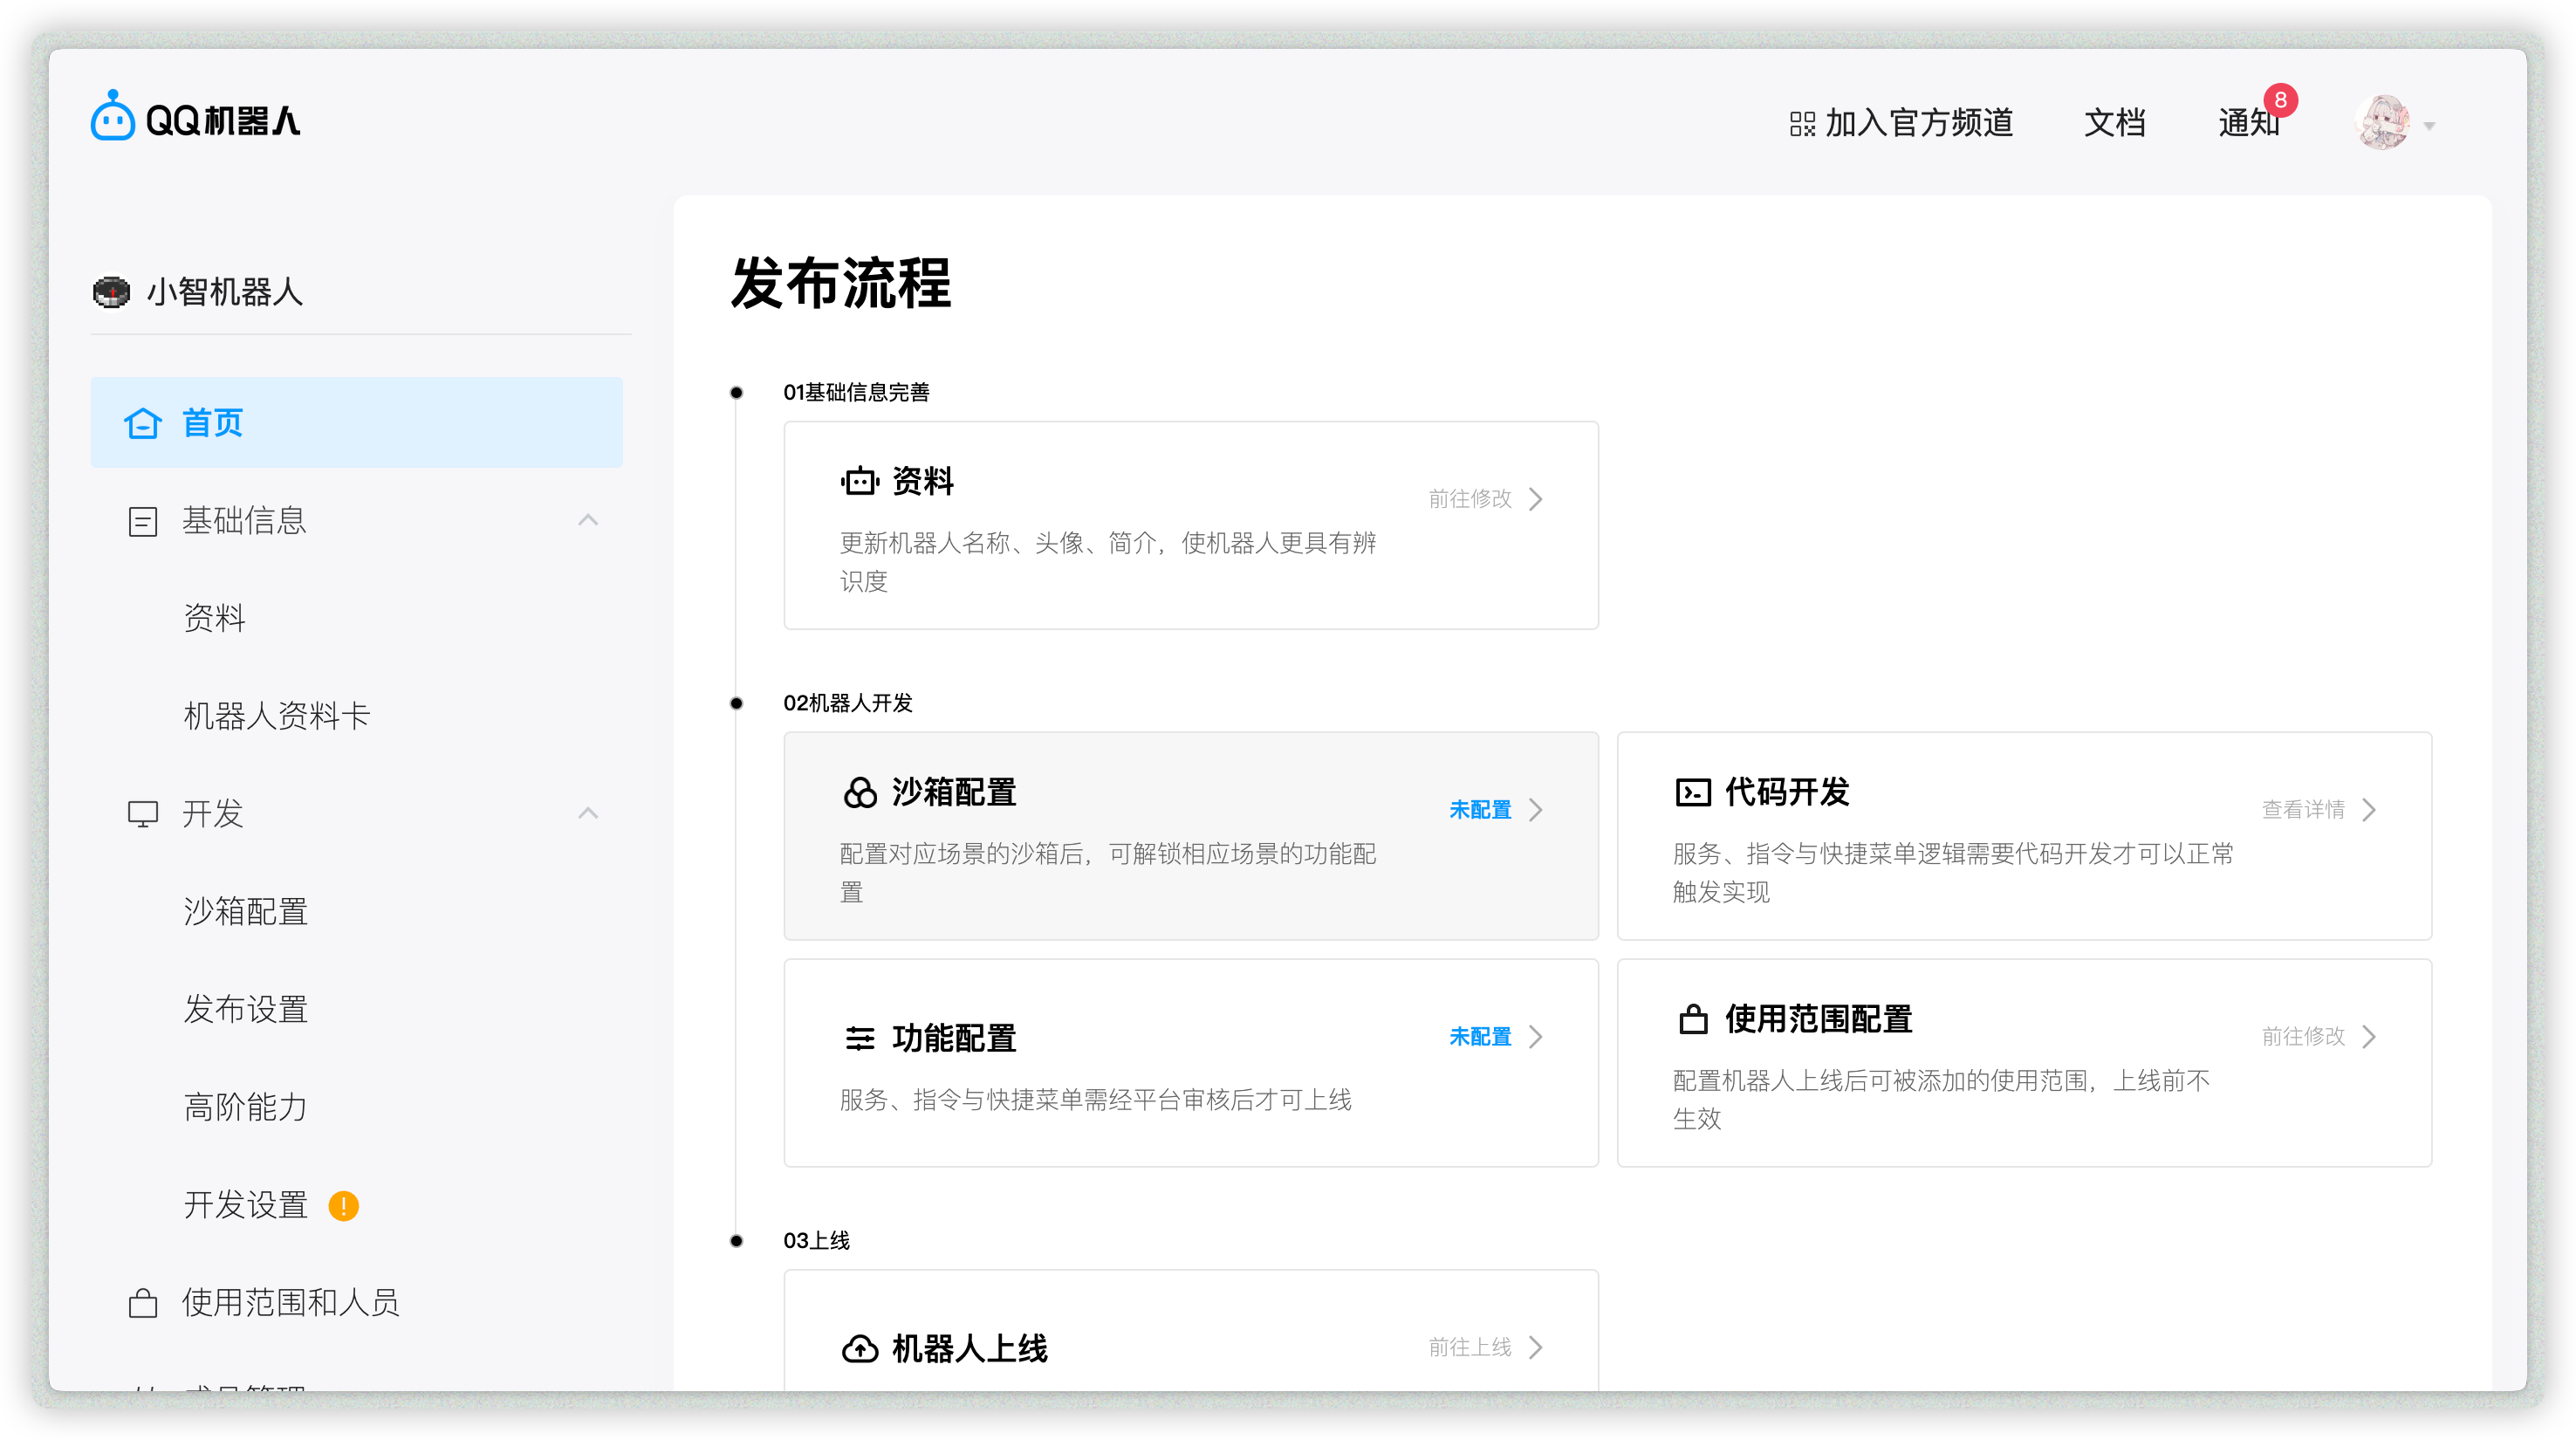
## Apply for a Bot
Open [QQ Official Bot](https://q.qq.com) and sign in.
Create a bot, fill in name/description/avatar, then submit for review. After security verification passes, creation is complete.
Open the created bot to enter its management page:
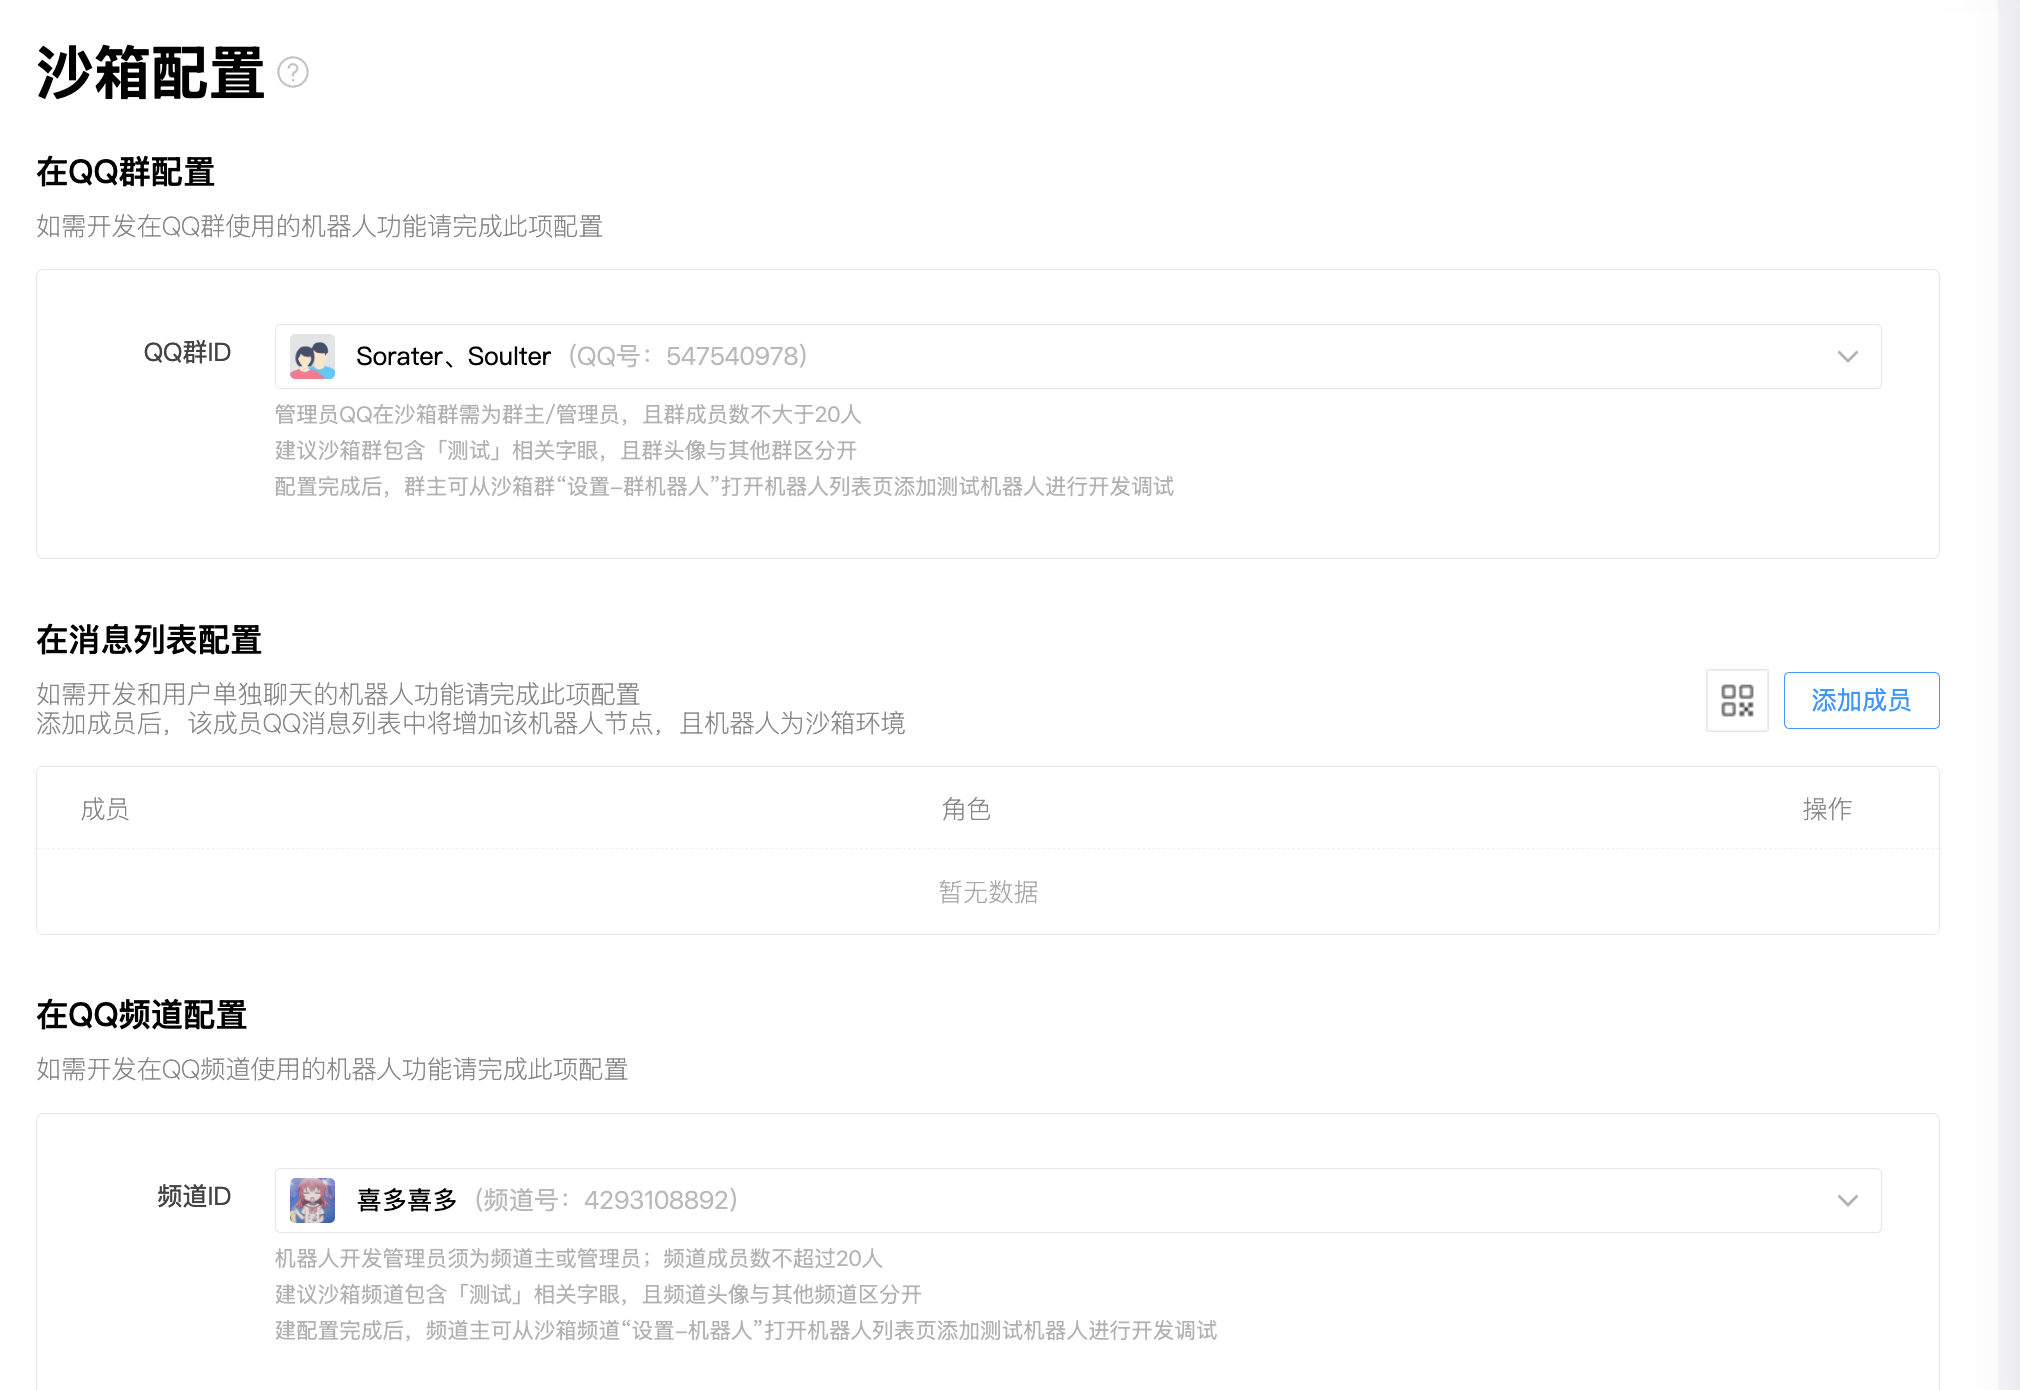
## Allow Bot in Channel / Group / Private Chat
Open `Sandbox Configuration` to set a sandbox channel / QQ group / QQ private chat (up to 20 members).
Then configure QQ groups, private chat QQ accounts, and QQ channels as needed.
## Get `appid` and `secret`
After adding the bot where you need it, open `Development -> Development Settings`, then copy `appid` and `secret`.
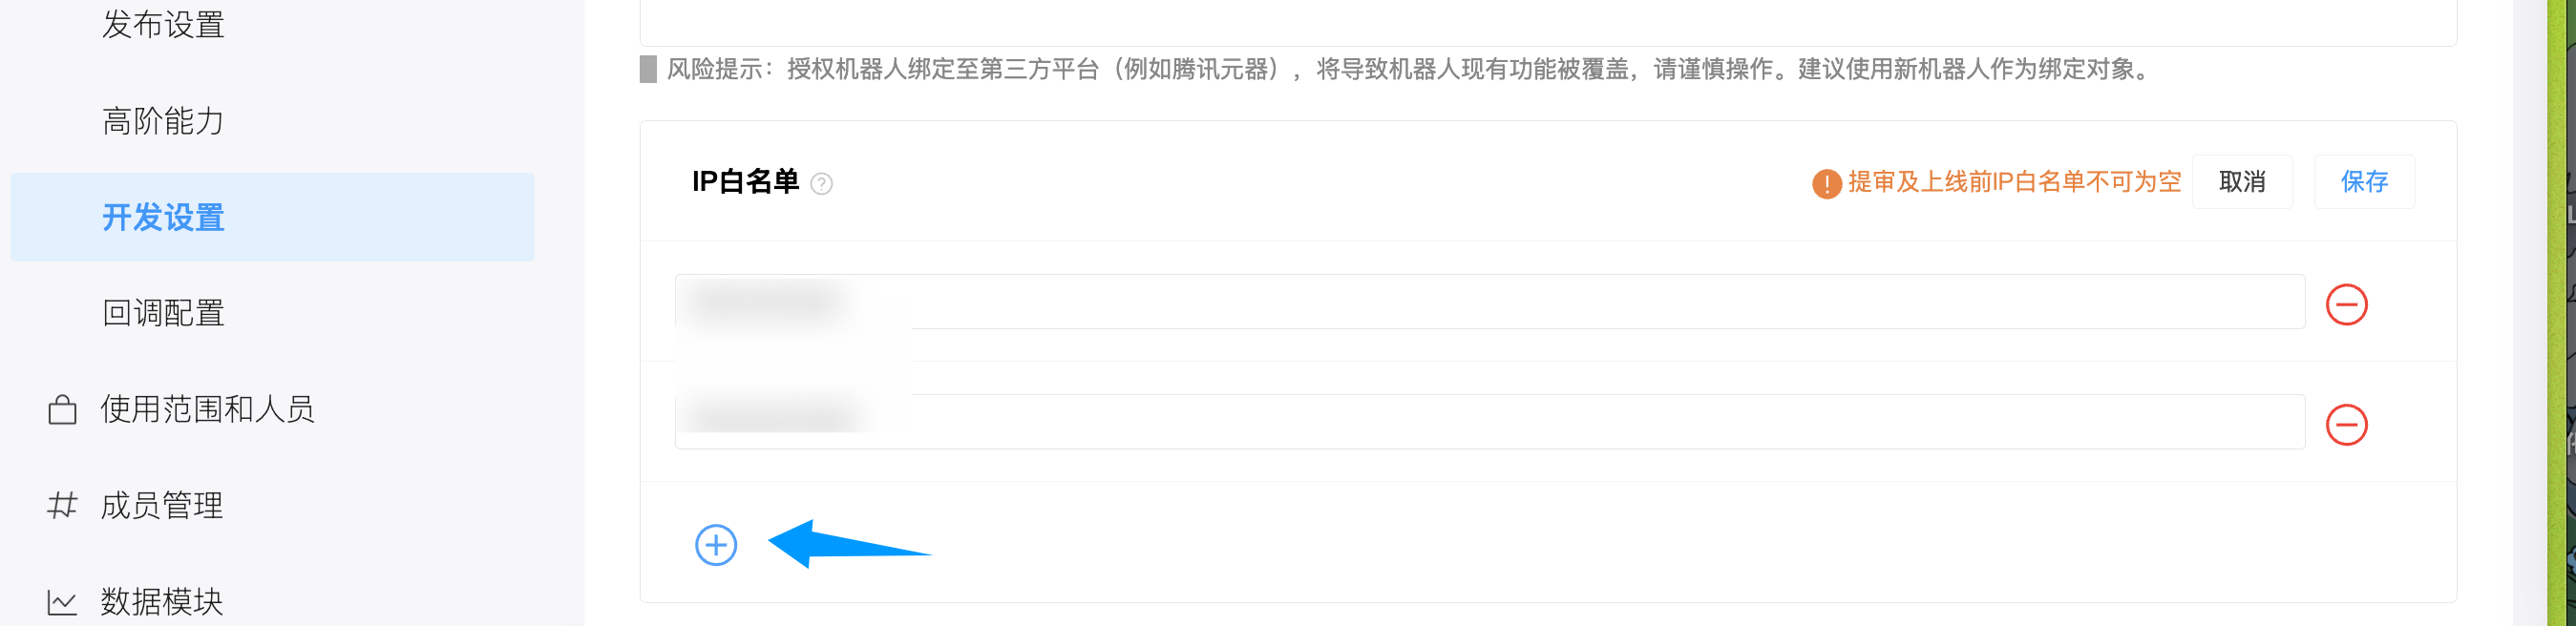
## Add IP Whitelist
Open `Development -> Development Settings`, find IP whitelist, and add your server IP.
## Configure in AstrBot
1. Open AstrBot Dashboard.
2. Click `Bots` in the left sidebar.
3. Click `+ Create Bot`.
4. Select `qq_official_webhook`.
Fill in:
- ID (`id`): any unique identifier.
- Enable (`enable`): checked.
- `appid`: from QQ Official Bot platform.
- `secret`: from QQ Official Bot platform.
Click `Save`.
## Configure Callback URL
In `Development -> Callback Configuration`, configure callback URL.
Set request URL to `<your-domain>/astrbot-qo-webhook/callback`.
Your domain should reverse-proxy traffic to AstrBot port `6196` using `Caddy`, `Nginx`, or `Apache`.
Then add callback events and select all four event categories (private, group, channel, etc.).
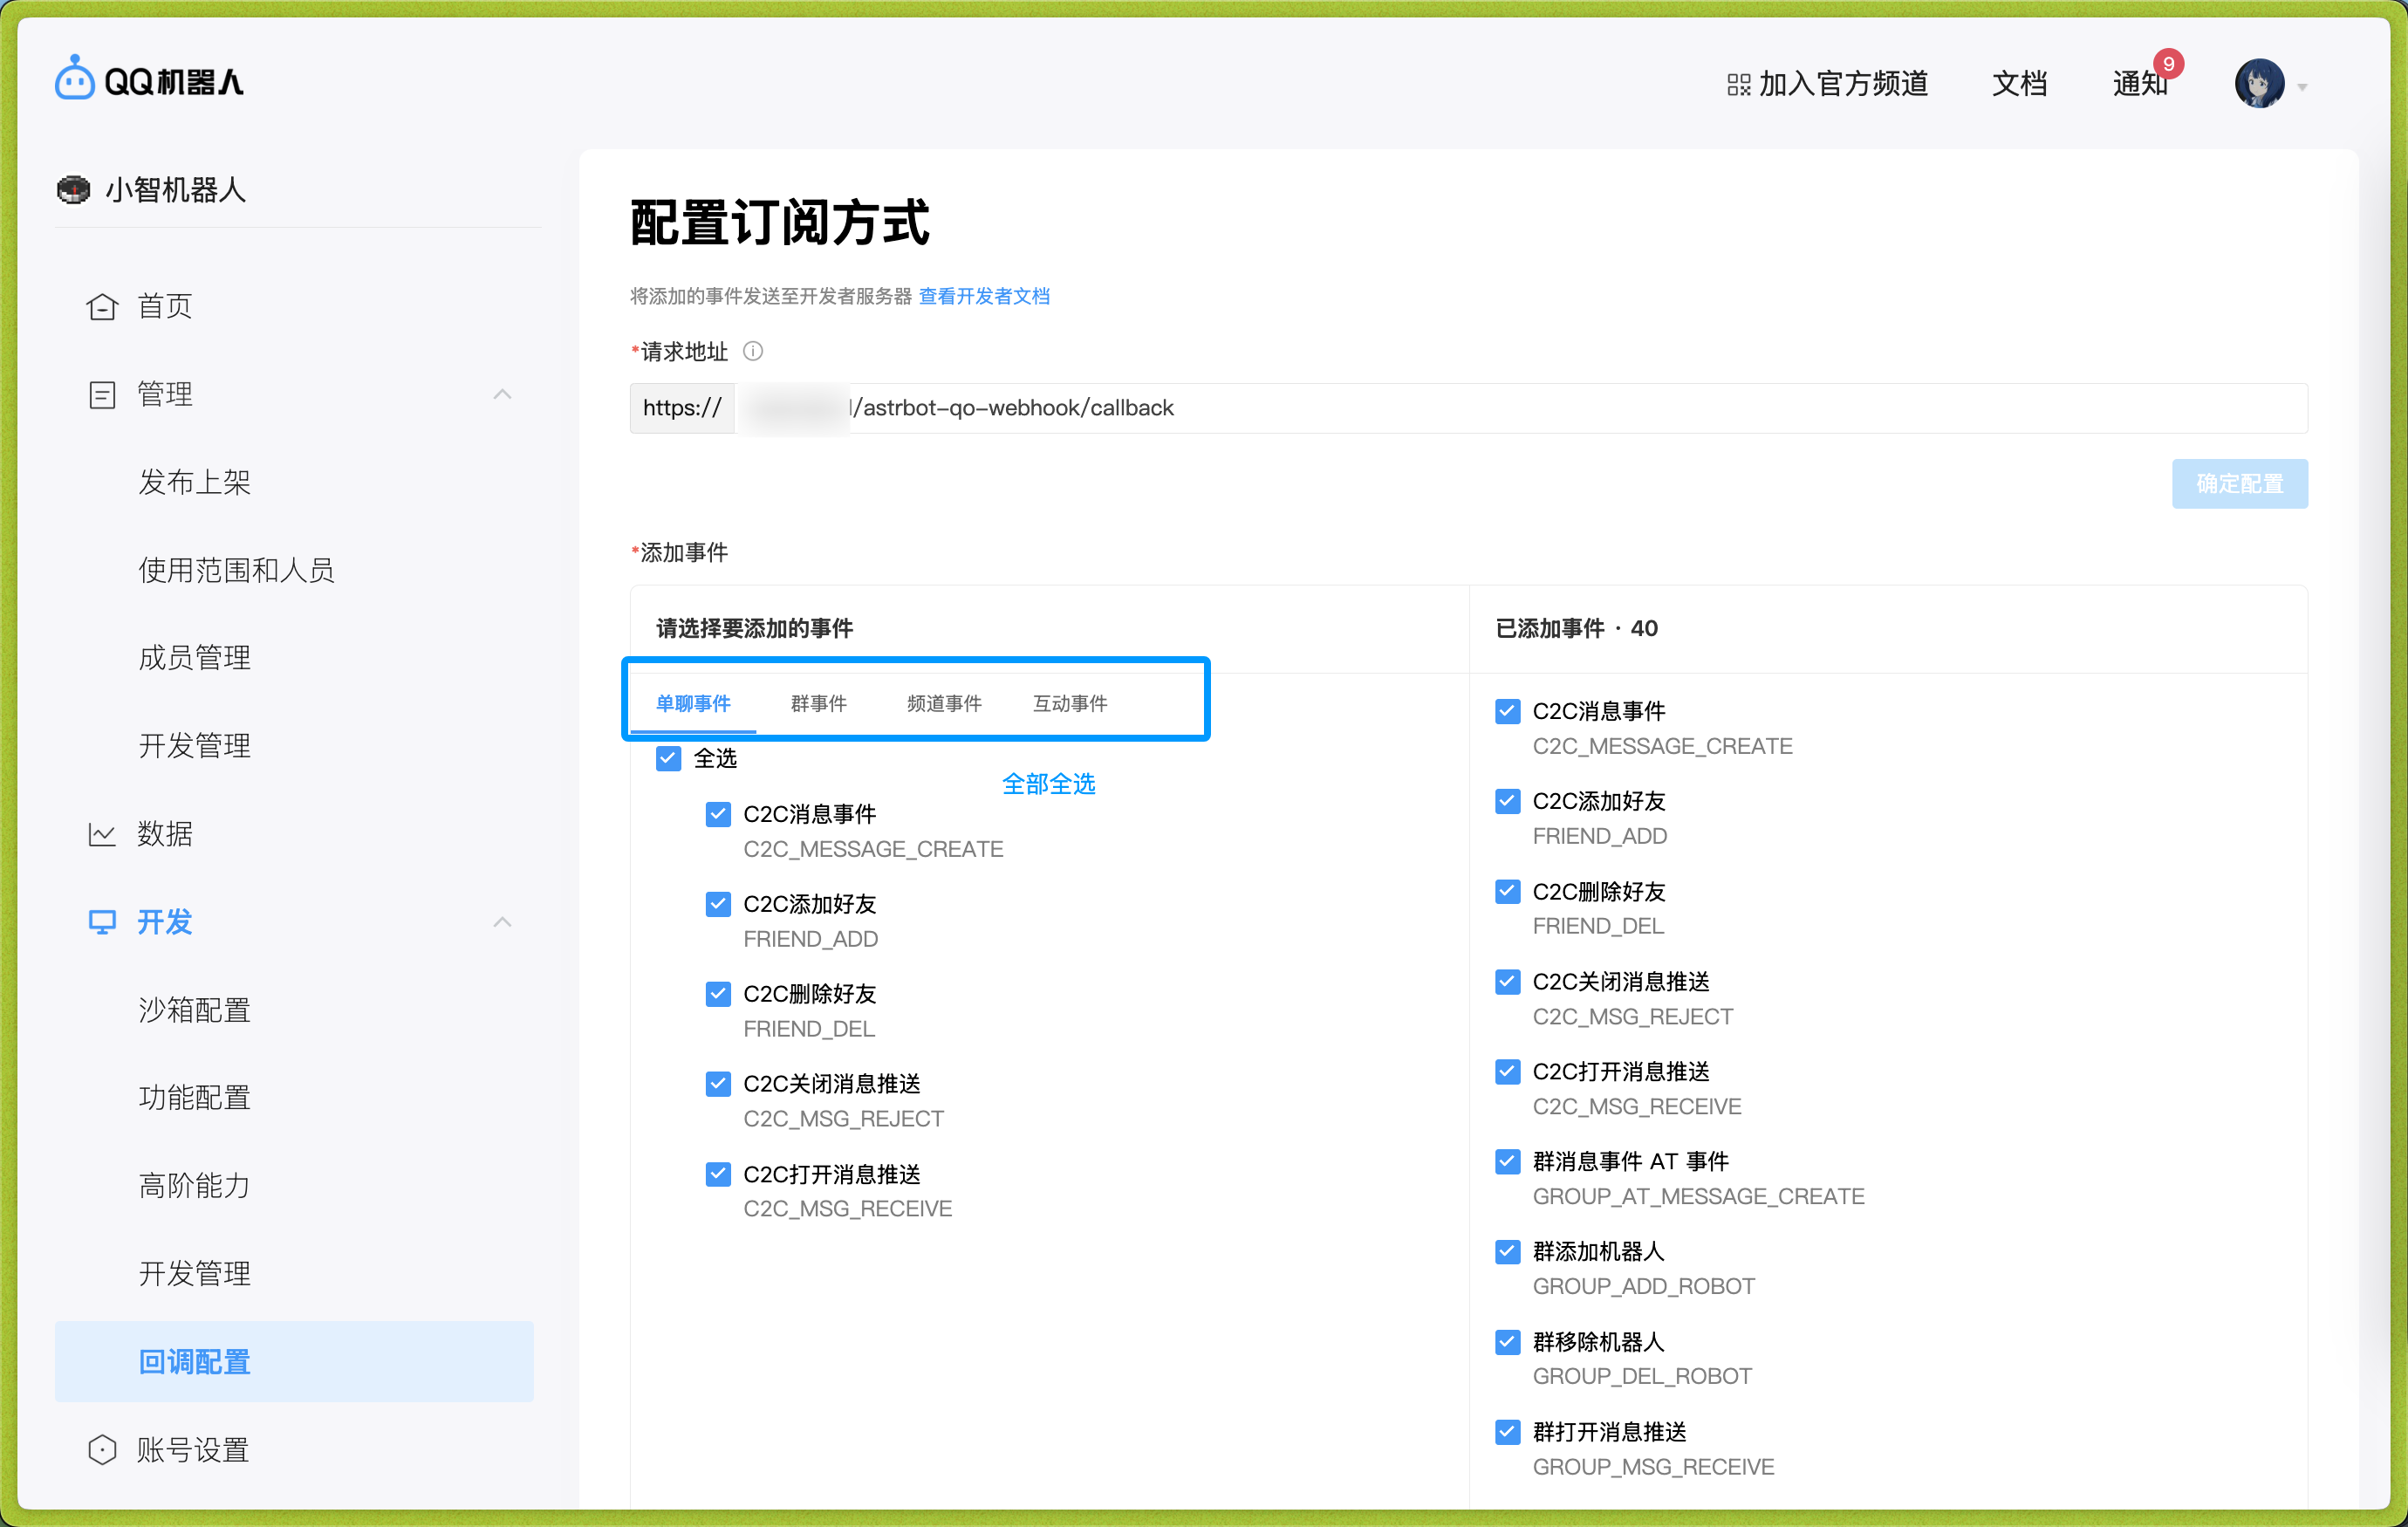
After entering values, move focus out of the input box to trigger validation. If validation passes, the confirm button on the right becomes clickable.
Then restart AstrBot.
## Done
AstrBot should now be connected. If messages do not respond immediately, wait 1-2 minutes, restart AstrBot, and test again.
## Appendix: Reverse Proxy Setup
If you are new to reverse proxy, Caddy is recommended:
1. Install Caddy: <https://caddy2.dengxiaolong.com/docs/install>
2. Configure reverse proxy: <https://caddy2.dengxiaolong.com/docs/quick-starts/reverse-proxy>
Caddy can automatically apply TLS certificates for Webhook access.
|